Difficulty Level:
![]()
Skills Required:
CO: Cast On
K: Knit
DPN: Double Pointed Needles (the ability to knit in the round)
M1: Make 1 stitch
K2tog: Knit 2 stitches as 1 together
SSK: Slip Slip Knit
P2tog: Purl 2 stitches as 1 together
BO: Bind Off
Finished Size: approx 8cm wide x 9cm tall x 7cm depth (Please note that this size is made with the needles & yarn specified below, different yarns and needles size will produce different results)
Needles: US 3 – 3.25 mm
Yarn:
Body — Panda Cotton Blend 8ply in 15 Pink (dye lot #120609)
Inner ear / Tip of nose — Patons Australia Zest 8 Ply in 3707 (dye lot #33674)
Wing — Panda Cotton Blend 8ply in 3 Cream (dye lot #120602)
Facial Features:
little scrap of black yarn for face embroidery
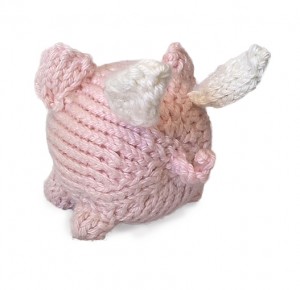
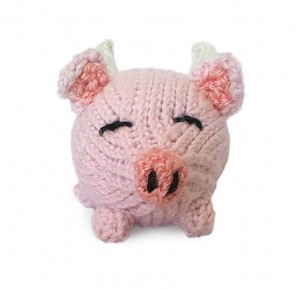
Oink, the flying pig is a free pattern designed by Susan B. Anderson, you can download it for free HERE. This cute piglet has wings attached to its body. It’s optional whether you decide to make it or not, but the clever Hi Bounce Pinky Ball adds a really nice touch! Susan has designed Oink to fit a bouncing ball within the body, so that he bounces when you drop him (yeap he flies!). Of course the ball is also optional — I couldn’t find a bouncing ball when I make mine so I have just stuffed him with the usual fiberfill.
This pattern requires some more skills compared to the Bunny Nugget one, however don’t get discouraged as I will go through them as much as I can. Aside from the ability to knit with DPN in the round, you will need to know how to make one stitch (m1), slip slip knit (ssk), whipstitch and do face embroidery. Out of all these, the trickiest stitch I found is m1. You encountered m1 as early as row 2 when you are starting to knit the body. I seriously spent hours (I think it was 3) getting stuck at this row and not knowing how to spot the yarn that is meant to be in between the two stitches. The best way to counter this is to practice the m1 in a separate needles & yarn by knitting a few rows first before you are attempting the m1 as it is easier to see the in between stitches when your knitting is longer. This YouTube video in particular helped me when learning m1
Tutorials: How to do M1
With ssk, you slip the first two stitches from the left needle to the right, then knitting the two yarn that you slipped together. The video below shows how this is done
Tutorials: How to do SSK
[media url=”http://www.youtube.com/watch?v=RGwcYW3GG3M” width=”600″ height=”400″]
Finding how to do whipstitch in YouTube was a little difficult, but with persistence anything is possible 😉 The video below consists of four short clips on joining two materials together, whipstitch is featured on the third one.
Tutorials: How to do Whipstitch
http://www.youtube.com/watch?v=L3rvJx3-9Xs
Face embroidery in this particular project is a little bit tricky since the pig body has been sealed. Here is a helpful video teaching you how to secure your yarn properly so that the thread is invisible to the naked eye.
Tutorials: How to secure your yarn in Face Embroidery
That is it! Hopefully this blog has helped cleared some of your questions with knitting this pattern.
Have a wonderful weekend and Happy Knitting! ♥


Hi there
I think I have done something wrong with row 4….
I read it as
K1
M1
Then knit all the stitches to end of round
Then m1 k1
It takes a lot of r,ows to get to 39 stitches and at the moment the pig seems to long and not fat enough plus already about 2 inches and not on the decrease as yet…. Have I misunderstood?
Thanks
Ruth
Hi Ruth,
Hope you are well.. It’s been a while since I did this pattern, but I think you may have misunderstood the pattern.
I think you should read it as:
Round 4:
k1
m1
knit to the last stitch on the needle (notice it says needle and you are holding 3 double pointed needles 🙂 therefore it’s not until the end of the round.
m1, k1
then you repeat on each needle
I hope this helps you..
Kind Regards,
Dina
Pingback: FREE Halloween Candy Corn Easy, Intermediate Knit Pattern! | FREE Cute Knitting Patterns | How to Knit Tutorials | Fun & Easy Knitting Projects
Pingback: FREE Cute Fried Egg Knitting Patterns | How to Knit YO (Yarn Over) | FREE Cute Knitting Patterns | How to Knit Tutorials | Fun & Easy Knitting Projects
I really like your writing style, fantastic info , appreciate it for posting : D.
Hi Brandon, thank you for your compliments : ) I hope to see you again later