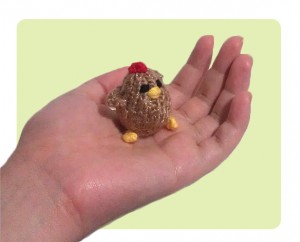
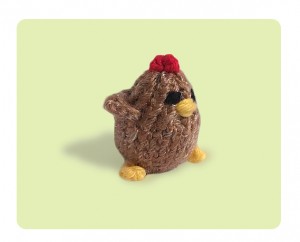
Difficulty Level:
![]()
Skills Required:
CO: Cast On
DPN: Double pointed needles
Kfb: Knit front and back
K: Knit
P: Purl
K2tog: Knit 2 stitches as 1 together
BO: Bind Off
Picking up stitches
Knitting I-Cord
Finished Size: approx 4.5cm tall x 3.5cm wide x 3cm depth (Please note that this size is made with the needles & yarn specified below, different yarns and needles size will produce different results)
**Note that due to the tiny size this is NOT a toy, and unsuitable to be given to under 3yo toddlers due to potential chocking hazards**
Needles: US 3 – 3.25 mm
Yarn:
Body & Wings — Patons Australia Zhivago Home in 5 (dye lot #762275)
Comb — Panda Cotton Blend 8ply in 18 (dye lot #11621)
Legs — Panda Cotton Blend 8ply in 6 Yellow (dye lot #120501)
Facial Features:
scraps of black yarn for the eyes & the same yellow yarn for the beak
So yesterday I was having the urge to suddenly knit something. I haven’t knit for a few days since I was crazily busy getting this blog up and running, but now I thought it’s a good time to get back to knitting again.
I always research what I wanted to knit and usually it takes forever (searching for patterns online and comparing them from one another, searching for actual images for colour inspiration, yarn selection process, all takes ages to do!). So after deciding I want to knit a Panda hat, I just found out that I don’t have suitable black yarn at home. Since it was just after midnight, I had no choice but to choose something else to knit. That’s where this extra tiny chickens came in. This tiny chickens pattern is designed by Anna Hrachovec, and you can find it HERE.
This tiny chickens were quite challenging to make, aside from knowing how to use DPN I also needed to learn some new skills. The first is Kfb (Knitting in the front and back). Kfb, just like M1 is another technique of adding an extra stitch to your needle. The way is slightly different and I personally find it a little easier as you don’t need to second guess where the in between stitches are like in M1.
Tutorials: How to Knit increases: Kfb
The next one is learning how to pick up stitches. This technique is used in creating the comb and wings for the chicken. It’s a nifty way of joining the knitting together which takes less time than creating the parts separately and then joining it together at the end. What you have to do is essentially locate the “V” shape of your stitches and insert your needle to begin knitting again. I had trouble picking up the stitches as my yarn kept slipping off, so I used a crochet needle to pick them up (it was much easier!). When you get up to knitting the wings, you will notice that the pattern has a mistake in it. Anna has corrected the mistake in her blog HERE
Tutorials: How to pick up stitches in Knitting
Last but not least is learning how to knit an I-Cord. This was my favourite tutorials, she explains I-Cord and make it sounds so simple. Also in this video she teaches you how to do CO (Cast on) using your hand instead of needles. This technique is a big time saver as you can cast on much faster with hand therefore it’s much easier to count your stitches as you cast. To knit I-Cord, the main point is that you should never turn around your needles and instead slide off your work to the other side, then you knit again.
Tutorials: How to knit I-Cord & How to do Hand (CO) Cast On
While I was knitting my tiny chicken, I notice that the wings were a little short. If I knit another one I would knit extra rows to make them slightly longer.  The hardest part I found were actually inserting the legs inside the body. I love to stuffed my toys really tight (which explains why my chicken looks plump ;)), and it was really difficult to pull through the i-cord along the fiberfill. But finally after I push and push.. it went in successfully. One side of the i-cord looks really strained after the force-pulling (Ooops), but luckily I found the legs looks too long anyway so I just undo some of the stitches to make them look cute and even.
Now that it’s all done, my tiny chicken somewhat looks a little lonely by itself. Maybe if you can knit one too, be sure to post / tag it to the Facebook page and share it with us!


Pingback: Free Cute Mouse Knitting Pattern | How to knit iCord & Sl1 K2tog Psso | FREE Cute Knitting Patterns | How to Knit Tutorials | Fun & Easy Knitting Projects
Pingback: FREE Cute Fried Egg Knitting Patterns | How to Knit YO (Yarn Over) | FREE Cute Knitting Patterns | How to Knit Tutorials | Fun & Easy Knitting Projects